
こんにちは。macco(まっこ)です。
対象の読者は以下を想定しています。
- Windowsを使っていて、Dockerに興味がある
- Windows 10 home の更新プログラムに制限がかかっていて、WSL2が使えない
- Dockerを使ってみたいけど、どうしたらいいか分からない
本記事を読めば、Dockerの導入方法が分かります。
第1回目はVirtualBoxの導入からネットワーク設定まで執筆しています。
前回の記事を読んでない方は、こちらをご覧ください。
ここからは第1回目の続きとして、VirtualBoxの仮想マシン(CentOS 7)にDockerをインストールして動作確認をするところまで解説していきます。
CentOS 7のシステムアップデートをする
まずVirtualBoxのCentOS 7を起動して、rootログイン後yumコマンドでシステムアップデートをします。
# yum -y updateOS内部のパッケージ等が最新バージョンに更新されます。
Dockerの古いバージョンをアンインストールする
Dockerの古いバージョンがインストールされている可能性があるので、念のため以下のコマンドで確認します。
# yum list installed | grep docker何も表示されないのであれば、インストールされていないのでそのまま次に進んでください。
もし古いバージョンがインストールされていたら、以下のコマンドでアンインストールしておきます。
# yum -y remove docker docker-client docker-client-latest docker-common docker-latest docker-latest-logrotate docker-logrotate docker-engineDockerのリポジトリを設定する
Dockerをインストールする方法はいくつかありますが、今回は公式サイトでも推奨している「リポジトリを使用してインストールする」方法で進めていきます。
まずyum-utilsパッケージをインストールします。
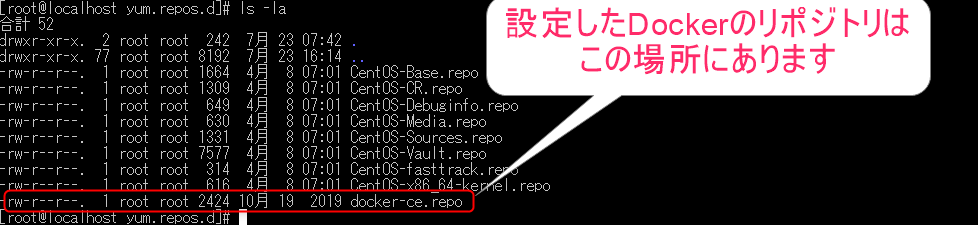
# yum -y install yum-utils次にDockerのリポジトリを設定します。
# yum-config-manager --add-repo https://download.docker.com/linux/centos/docker-ce.repo上記のコマンドを実行することで、Dockerのリポジトリは「/etc/yum.repo.d/」に追加されます。
Dockerをインストールする
準備ができましたのでDockerをインストールします。
# yum -y install docker-ce docker-ce-cli containerd.ioDockerを起動する
Dockerを起動します。
# systemctl start docker起動されているか確認します。
# systemctl status dockerActive: active (running)と表示されていれば、起動中というステータスを示します。
OSが起動するたびに、Dockerも自動で起動するように設定しておきましょう。
# systemctl enable dockerDockerの自動起動が設定できているかを確認します。
# systemctl is-enabled docker画面に「enabled」が表示されればOKです。
Dockerの動作確認をする
Dockerエンジンが起動しているかを確認してみましょう。
公式サイトで用意されている以下のコマンドを実行します。
# docker run hello-world[root@localhost ~]# docker run hello-world
Unable to find image 'hello-world:latest' locally
latest: Pulling from library/hello-world
0e03bdcc26d7: Pull complete
Digest: sha256:49a1c8800c94df04e9658809b006fd8a686cab8028d33cfba2cc049724254202
Status: Downloaded newer image for hello-world:latest
Hello from Docker!
This message shows that your installation appears to be working correctly.
To generate this message, Docker took the following steps:
1. The Docker client contacted the Docker daemon.
2. The Docker daemon pulled the "hello-world" image from the Docker Hub.
(amd64)
3. The Docker daemon created a new container from that image which runs the
executable that produces the output you are currently reading.
4. The Docker daemon streamed that output to the Docker client, which sent it
to your terminal.
To try something more ambitious, you can run an Ubuntu container with:
$ docker run -it ubuntu bash
Share images, automate workflows, and more with a free Docker ID:
https://hub.docker.com/
For more examples and ideas, visit:
https://docs.docker.com/get-started/上記のメッセージが表示されれば、正常に動作しています。
終わりに
全2回にわたって解説してみましたが、いかがでしたでしょうか。
Windows 10 home editionでDockerを使う場合、「Docker for Windows」を使うのが通常だと思います。
しかし、私もそうであるようになぜかWSL2が使えない人もいると思います。
その人達に向けて、少しでもお役に立てれば嬉しいです。


